


 Title Index
 Recently Changed
 Page Hierarchy
 Incomplete
 Tags
Tags


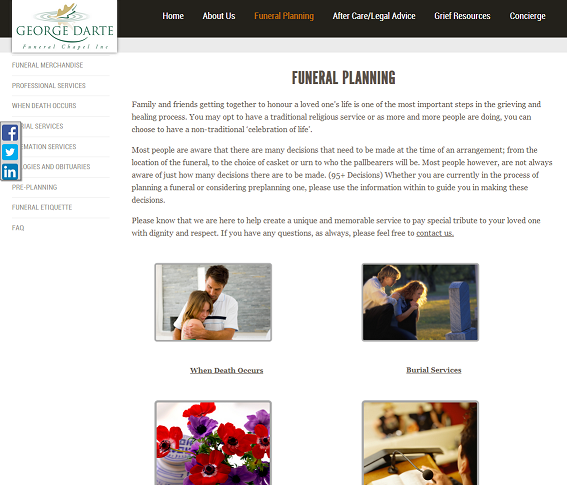
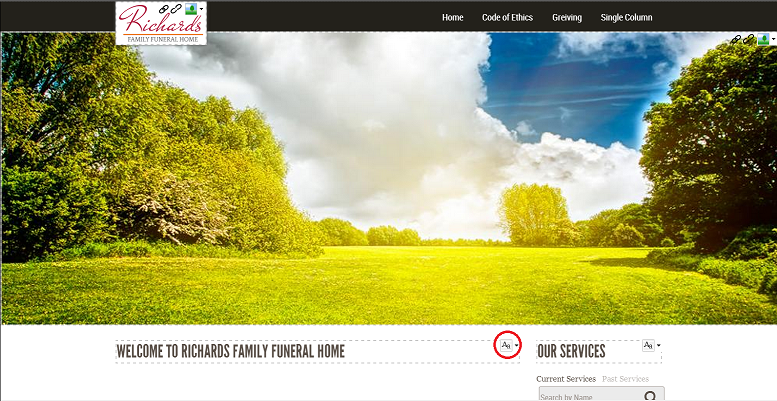
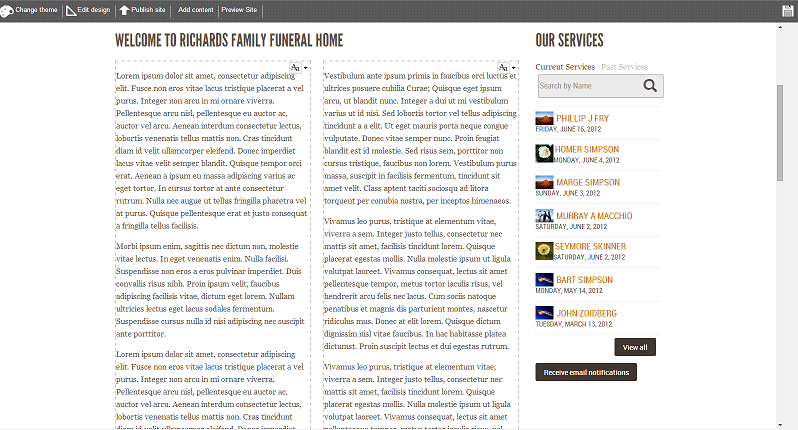
This document covers the basics of the FuneralTech CMS. The FuneralTech CMS is a Java-based web application used to host the websites of our clients. The following is an example of the home page of a client of ours:

This is an example of a 'home page'. Pages in the CMS fall under one of three categories:
Home Pages
A home page is typically what a visitor will see when they first visit the site. There is almost always some sort of large banner and logo located at the top of the page (see above image), and there is also usually a listing of recently deceased persons (note the listing under 'Our Services' in the above image).
Inside Pages
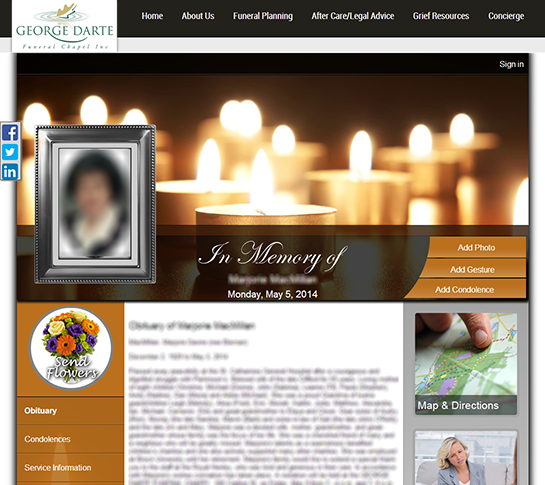
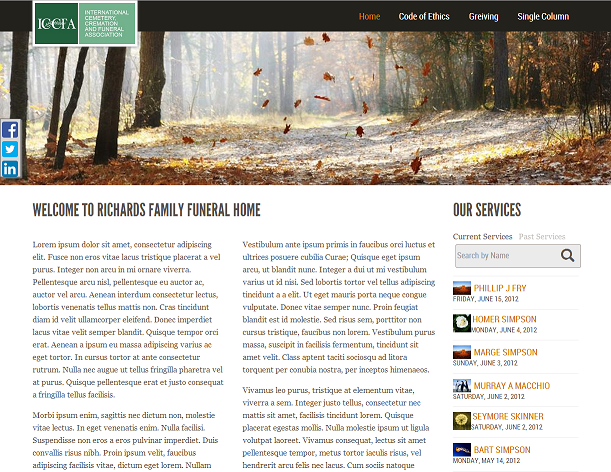
An inside page is typically what a visitor will see after clicking a link to another page. Inside pages tend to be more content-focused than home pages - the banner from the home page is not present, nor is the list of deceased persons. The following is an example of an inside page, from the same website as the home page above:
Please note that much of the above distinction between home pages and inside pages is just convention - it is entirely possible for a user to have multiple home pages, for inside pages to look the same as home pages, or for a site to consist entirely of inside pages.
Widget Pages
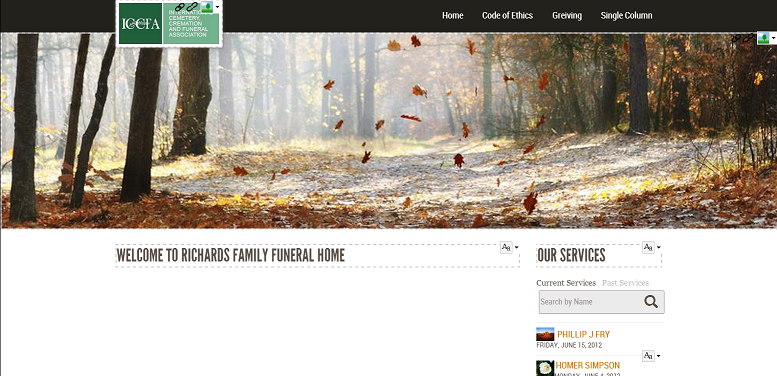
A widget page is a page that contains content that is automatically generated by the server. Such pages cannot be customized through the site editor (covered later). For example, clicking on one of the deceased in the home page listing will bring the user to a page similar to the following (content blurred):
The Site Editor
The site editor is the tool used by users to design their website. It allows users to add and delete pages, as well as customize the content within pages.
Logging in to the Site Editor
The site editor can be accessed through the admin panel of a website. The admin panel is accessed by clicking the 'admin' link, located at the very bottom of every site. After entering a username and password, the site editor can be accessed by clicking the 'Edit Site' link. You will be given the username and password for your testing site when you are hired.
Site Editor Layout
The following is an example of what the site editor looks like (not from the above site):

There are a few items to note here:
-
Site selection dropdown.
- If a client has more than one site, the site to be edited must be selected here.
-
Page list.
- Once a site is selected, all of the pages in the site are listed here.
- Pages in this section can be re-arranged by dragging them around with the mouse.
-
Various commands
- 'Edit Design' - allows the user to edit the overall design of home and inside pages.
- 'Publish Site' - Changes made in the Site Editor will not be visible to the public until this button is pressed.
- 'Add Content' - Used to add additional content when editing a page (more on this later)
- 'Preview Site' - Allows the user to view what their site will look like before publishing.
- Save button - Saves any changes the user has made when editing a page or page design.
-
Page editor pane
- This is a WYSIWYG editor for pages and page designs.
When a page is selected on the left menu, the following dropdown menu will appear:
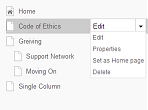
The page options are as follows:
- 'Edit' - Opens the page for editing.
- 'Properties' - Allows the user to select the page type (home, inside, or widget), and change the page title.
-
'Set as Home page' - Sets the page as the default page seen when a user visits the base domain of the site
- Rather confusingly, this has nothing to do with the page type. It's perfectly possible to set an inside page as 'the home page'.
- 'Delete' - Deletes the page.
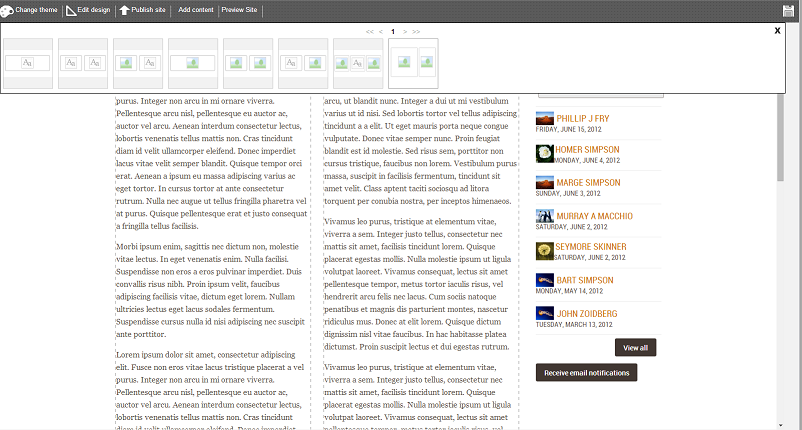
Editing Page Designs
When the 'edit design' button is clicked, the following menu appears:
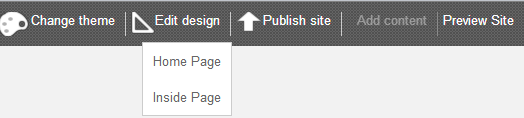
These two options allow the user to customize elements that are common to all home pages, and elements that are common to all inside pages, respectively. When either button is clicked, the page editor pane will change to something similar to the following:
The elements surrounded by dashed lines are called 'placeholders'. These are items that can be edited by the user. What placeholders are available for editing is controlled by the skin used by the site. For example, in the above image, there are four placeholders:
- The logo in the upper left
- The large banner in the middle
- The 'Welcome to Richards Family Funeral Home' title
- The 'Our Services' title.
The highlighted button in the above picture allows the user to select what kind of content will go into the placeholder. Every placeholder will have one of these buttons. Clicking on it brings up the following menu:

Clicking on one of these options will change the type of content in the placeholder. There are three options in this menu:
- 'Text area' - Placeholders of this type hold formatted text, as well as inline images and links.
- Image/Video - Placeholders of this type hold a single image, or a single video.
- Widget (not to be confused with 'widget pages' above) - Placeholders of this type hold one of a number of special objects. For example, it is possible to add a slideshow widget, which displays a customizable set of images to the user.
For the purposes of demonstration, both the 'Richards family...' logo image in the upper left, and the banner in the center will be changed to the following:
After doing this, the save button was pressed, saving the changes, and then the publish button was pressed, making the changes visible to site visitors. After this edit, this is what the main site looks like:
Also, the 'Code of Ethics' page, which is also set to be a home page (rather than an inside page), looks like this:
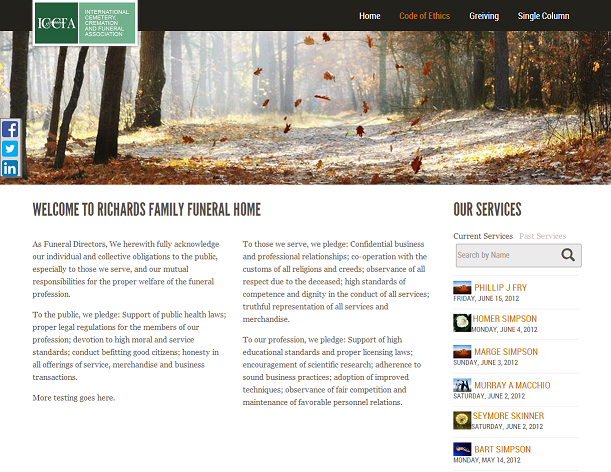
Notice how our design changes are reflected in both pages, but the actual content (below the title) is different.
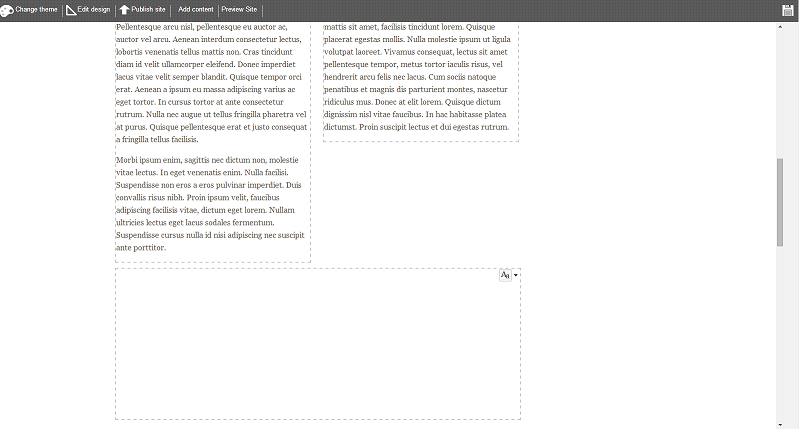
Editing Page Content
Each page in a site has a single section dedicated to the actual content of the page. This section is can be modified by selecting a page in the site editor, and clicking the 'edit' button. The resulting UI is very similar to that of the design editor:
The concept of editable placeholders should already be familiar from the design section above. Note that the 'add content' button, which was previously disabled in the design editor, is now enabled. Also note that the placeholders that were editable in design mode are now no longer editable - only the main content for the page being edited is.
Clicking on the 'add content' button will bring up the following menu:
Each of these options will add an additional row of placeholders underneath the bottom-most set of placeholders in the page. For example, clicking the first option in the menu above will have the following effect:
Content placeholders can be deleted or re-arranged by hovering your mouse over the placeholder, and clicking the various buttons that pop up on the left side.
The Deployment Manager
The Deployment Manager is the tool used to upload new skins, to upload updates to existing skins, and to assign skins to sites. The Deployment Manager has other uses, but these are beyond the scope of this article.
The deployment manager for skin testing can be accessed at http://admin.twintiers.ca/DeploymentManager/login.html. You will be given the username and password for the deployment manager when you are hired.
Uploading a Skin
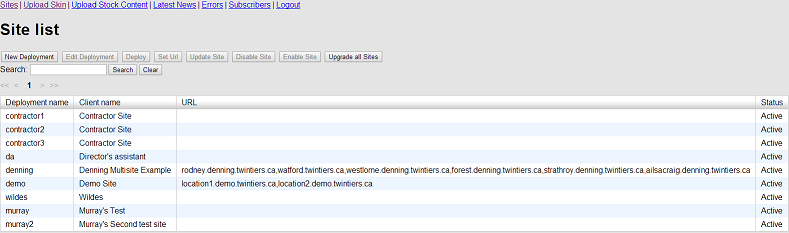
Upon logging into the deployment manager, you will be presented with a listing of CMS sites that looks similar to the following:
To upload a new skin, or upload an update to an existing skin, first click the 'Upload Skin' link in the upper left. This will provide you with the following page:
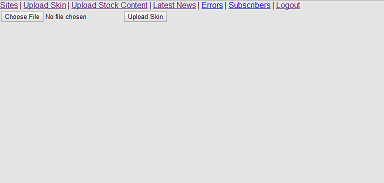
To upload a skin from this page, first press the 'choose file' button, then select the zipped skin files, and then press the 'upload skin' button. If you are uploading a new skin, the skin will be available for use after the upload is complete. If you are updating an existing skin, then all sites using that skin will be immediately updated after the upload is complete.
If you are uploading an update to a skin that was already previously updated, you must ensure that the name of the zip file is the same as was previously used.
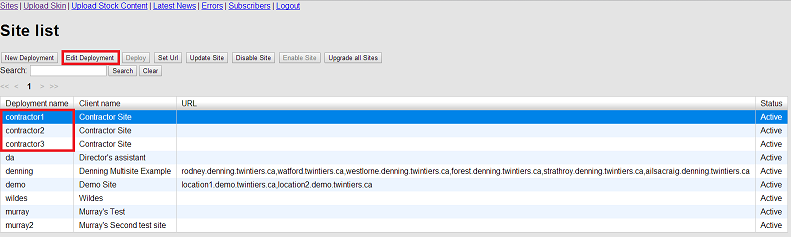
Changing the Skin of a Site
Navigate back to the site listing by pressing the 'sites' link in the upper left. As a skin contractor, there are five sites that you will be using for skin development:
- contractor1 - This site can be viewed at contractor1.twintiers.ca
- contractor2 - This site can be viewed at contractor2.twintiers.ca
- contractor3 - This site can be viewed at contractor3.twintiers.ca
- contractor4 - This site can be viewed at contractor4.twintiers.ca
- contractor5 - This site can be viewed at contractor5.twintiers.ca
You will be instructed beforehand on which of the five sites to use. To change the skin of one of these sites, select the site from the site listing, and click the 'Edit Deployment' button:
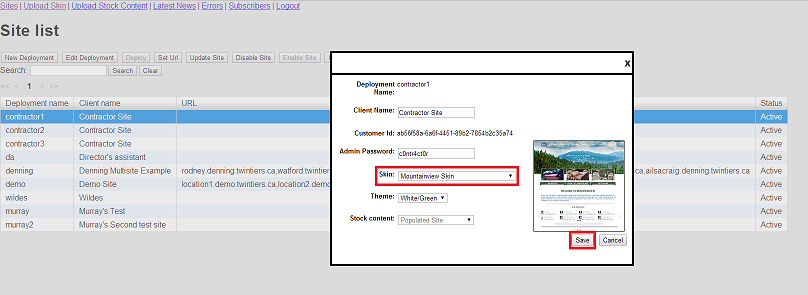
This will open a small popup. From here you select the skin that you want the site to use, and press the 'save' button to save your selection.
To update the site to use the newly assigned skin, select the site from the site listing, and press the 'Update Site' button.